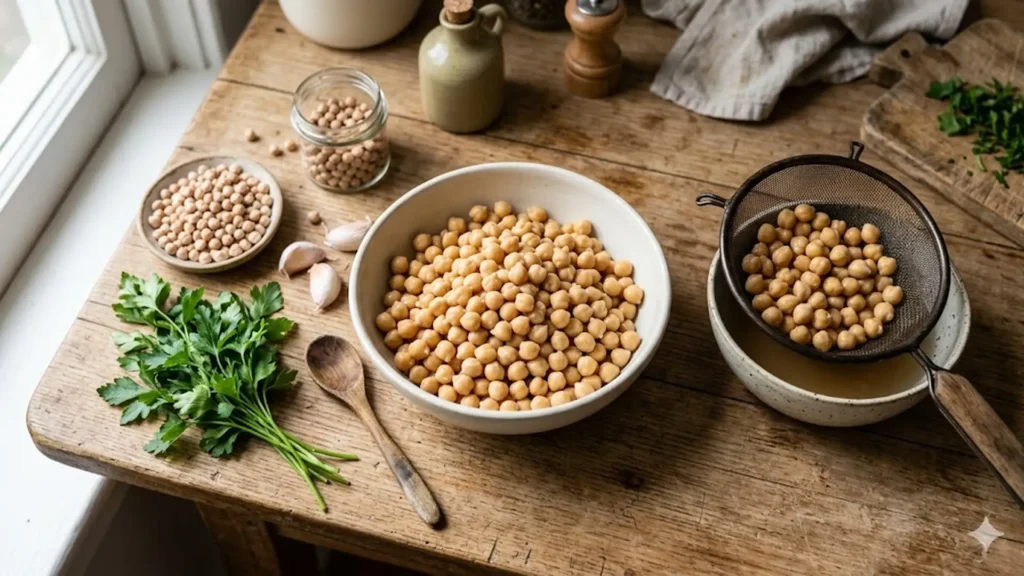
How to prepare chickpeas for cooking is the step that decides whether your final dish is creamy and tender or chalky and tough, and it starts long before the pot goes on the heat. Most recipes rush past the prep and jump straight to boiling times, but sorting, soaking, salting, and deciding whether to peel are the choices that actually control texture, digestibility, and flavor. This guide covers preparing both dried and canned chickpeas, the soaking methods that work and the one that does not, the real role of baking soda and salt, and how to set yourself up for hummus, salads, curries, or roasting. I cook chickpeas constantly for this site, so the numbers and habits below are what hold up in a home kitchen, not just on paper.
Dried or Canned: Which to Prepare and When
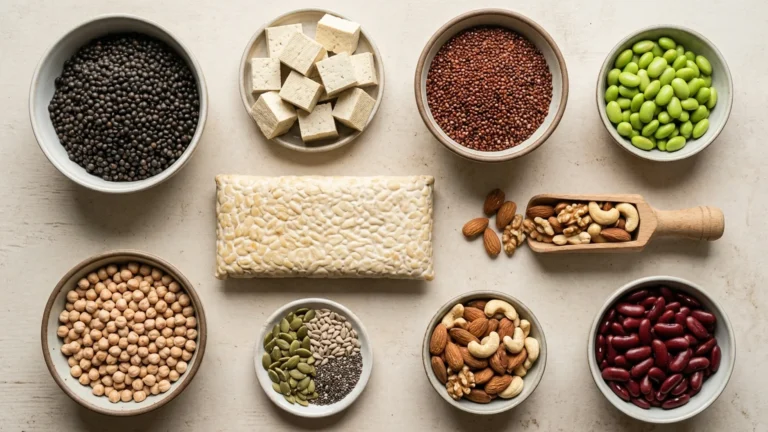
Both have a place, and preparing each one well matters. Dried chickpeas cost a fraction of canned, give you control over salt and texture, and produce a creamier, more flavorful bean, especially for hummus. The trade-off is time, since they need soaking and an hour or more of cooking. Canned chickpeas are ready in minutes and are genuinely fine for weeknight curries, quick salads, and roasting. The mistake people make with canned is skipping the prep entirely; even canned chickpeas need a real rinse and, for some uses, a peel.
My rule of thumb: cook a big batch of dried chickpeas when I have a free afternoon and freeze them, then keep canned on the shelf for the days I did not plan ahead. If you are deciding based on a specific dish, dried wins for hummus and slow braises where texture is the star, and canned is perfectly good when the chickpea is one player among many.
There is also a cost and yield angle worth knowing. One cup of dried chickpeas swells to roughly two and a half to three cups cooked, which is about the same as two standard cans, at a fraction of the price. So a single pound of dried chickpeas, soaked and cooked once, replaces five or six cans. If you eat chickpeas weekly, learning the prep below pays for itself quickly and gives you better-tasting beans into the bargain.
Step One: Sort and Inspect Dried Chickpeas

Before any water touches them, tip your dried chickpeas onto a sheet pan in a single layer and look. Bagged legumes routinely include small stones, clumps of dirt, shriveled or split beans, and the occasional bit of stem. A single pebble cracked between your teeth is enough to ruin a meal and possibly a filling, so this thirty-second step is not optional. Pull out anything that is not a plump, intact chickpea.
While you are looking, judge the age of your chickpeas. Fresh dried beans are smooth and uniform; ones that are very dull, cracked, or dusty are likely old. Age is the number one reason chickpeas refuse to soften no matter how long you cook them, because they have lost so much internal moisture that they cannot fully rehydrate. If you have had a bag in the cupboard for two years, buy fresh. Then rinse the sorted chickpeas in a colander under cool running water until the water runs clear.
Step Two: Soaking, and Why It Matters
Soaking does three things: it shortens cooking time, helps the chickpeas cook evenly so the centers are not chalky while the outsides blow out, and washes away some of the oligosaccharides that cause gas. For dried chickpeas I soak whenever I can. There are two reliable methods.
Long soak (best): Put the sorted, rinsed chickpeas in a large bowl and cover them with several inches of cool water, because they will roughly double in size and drink a lot of it. Leave them on the counter 8 to 12 hours or overnight. In a very warm kitchen, soak them in the fridge so they do not start to ferment. Drain and rinse before cooking.
Quick soak (when you forgot): Put the chickpeas in a pot, cover with plenty of water, bring to a boil for 2 minutes, then turn off the heat, cover, and let them sit for 1 hour. Drain and rinse. This gets you most of the benefit of an overnight soak in a fraction of the time.
Adding a teaspoon of salt or a pinch of baking soda to the soaking water can help soften the skins, but it is the cooking-water additions, covered below, that make the bigger difference. The one thing to avoid is soaking for too long in a warm room, which can turn the water sour and slimy. If it smells off, dump it and start over.
Can You Skip Soaking?
Yes, with the right method. A slow cooker or an Instant Pot will cook unsoaked dried chickpeas through, they just take longer. Unsoaked chickpeas in an Instant Pot run about 45 to 50 minutes at high pressure with a natural release, versus roughly 35 minutes if soaked first. On the stovetop, though, soaking is strongly worth it; unsoaked chickpeas in a saucepan can take well over two hours and cook unevenly. So if you skipped the soak and only have a pot, switch to the quick-soak method first rather than just simmering longer.
Salt and Baking Soda: Settling the Debate
The old kitchen lore says salting beans early makes them tough. Modern testing has put that to rest. Salt added to the cooking water actually helps chickpeas soften and, just as important, seasons them from the inside out in a way you can never replicate by salting at the end. I add about a teaspoon of salt per cup of dried chickpeas once they come up to a simmer. The real culprit behind tough beans is acid, not salt, so keep lemon, vinegar, and tomatoes out of the pot until the chickpeas are already tender.
Baking soda is the more interesting lever. A small amount, around a quarter teaspoon per cup of dried chickpeas in the cooking water, raises the pH and dramatically speeds up softening while loosening the skins. This is the single best trick for ultra-creamy hummus, because tender skinless chickpeas blend smooth. The downsides are that too much baking soda leaves a soapy, metallic taste and turns the beans to mush, and it adds sodium. So use a light hand, and skip it when you want chickpeas that hold their shape for a salad. If you want gas reduction without baking soda, a thorough soak and a full, soft cook do most of that work.
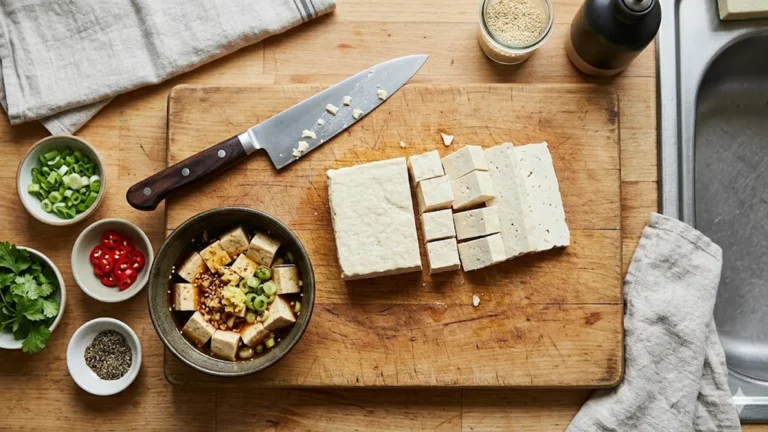
This balance between seasoning and texture is the same judgment call you make with other plant proteins. If you have read how to prepare tofu for cooking, the logic carries over: a little prep up front, then season in layers rather than dumping everything in at once.
How to Peel Chickpeas, and When It Is Worth It
The thin skin around each chickpea is harmless to eat but it is the difference between grainy and silky in a puree. For hummus, peeling is the secret most restaurants use. There are two easy ways. The first is the baking soda cook above, which loosens most skins so they float off; you skim them as the chickpeas simmer. The second, for already-cooked or canned chickpeas, is to put them in a bowl of water and rub them gently between your palms. The skins separate and rise to the surface where you can pour them off. It takes about five minutes for a can and noticeably improves anything blended.
For salads, curries, roasting, or stews, do not bother peeling. You want the structure the skin provides, and the texture of a whole chickpea is the point. Save the peeling effort for purees and dips where smoothness is everything.
If you are roasting chickpeas for a crunchy snack, the prep shifts slightly. Drain them well, pat them bone dry with a towel, and let them air-dry for a few minutes more, because surface moisture is the enemy of crispness. Leave the skins on, toss with a little oil and salt, and roast hot. Skins that flake off in the oven turn into extra-crunchy bits, which is a feature here rather than a flaw. The point is that how you prep depends entirely on where the chickpea is headed: smooth and skinless for dips, dry and intact for roasting, tender and seasoned for everything in between.
Cooking Times by Method Once They Are Prepped
Once your chickpeas are sorted, soaked, and salted, here is what to expect:
- Stovetop, soaked: Cover with fresh water by a couple of inches, bring to a boil, then drop to a gentle simmer and skim the foam. Tender in about 45 minutes to 1.5 hours depending on age. A gentle simmer keeps them whole; a hard boil splits them.
- Instant Pot, soaked: About 35 minutes at high pressure with a 10 to 15 minute natural release. Unsoaked, about 45 to 50 minutes.
- Slow cooker, unsoaked: About 4 hours on high or 6 to 8 on low, no soaking needed.
The doneness test is simple: a cooked chickpea should squish easily between two fingers with no firm core. For salads, stop right at tender. For hummus, cook them past tender until they are genuinely soft, even falling apart, because that is what blends creamy.
Keep an eye on the water level no matter which method you use. Chickpeas should stay submerged the whole time they cook, because any beans poking above the surface stay hard and chalky while the rest go soft. On the stovetop, top up with hot water if the level drops; in a pressure cooker this is not an issue since the lid seals everything in. Skimming the foam in the first ten minutes of a stovetop simmer also gives you a cleaner pot and a tidier final texture, especially if you plan to use the cooking liquid as aquafaba later.
Water, Altitude, and Other Reasons Chickpeas Fight You

If your chickpeas stay stubbornly firm even when fresh, two environmental factors are usually to blame. Hard water, high in calcium and magnesium, slows softening; cooking in filtered water or adding that pinch of baking soda counteracts it. High altitude lowers the boiling point of water, so beans take longer the higher you live, sometimes much longer. A pressure cooker is the reliable fix at altitude because it raises the effective temperature regardless of elevation. Beyond that, the usual suspects are old beans and early acid, both covered above.
Prepping to Reduce Gas and Improve Digestion
Chickpeas are famous for causing gas, and a lot of that comes down to prep rather than the bean itself. The oligosaccharides responsible are partly water-soluble, so the single most effective habit is to discard the soaking water and cook in fresh water rather than the cloudy liquid the chickpeas sat in. Some cooks change the water once more partway through cooking for extra-sensitive stomachs. A full, soft cook also helps, since undercooked beans are harder to digest than fully tender ones. Whole spices added to the pot, especially cumin, fennel, ginger, and a pinch of asafoetida, are traditional in many cuisines precisely because they ease digestion. Finally, if chickpeas are new to your diet, introduce them gradually; your gut bacteria adapt over a couple of weeks and the effect fades for most people. None of this requires special equipment, just a little intention during the soak and cook.
Don’t Throw Out the Cooking Liquid
The starchy liquid from cooked or canned chickpeas, called aquafaba, is one of the most useful byproducts in plant-based cooking. Whipped, it behaves like egg white and makes vegan meringues, mousses, and mayo; a splash also adds body to soups and helps hummus blend. Save it in a jar in the fridge for up to a week or freeze it in an ice cube tray. If you are exploring what counts as plant-based, the same curiosity that drives questions like whether hummus is healthy applies here, since aquafaba lets you replace eggs without any animal product at all.
For a deeper look at the nutrition behind legumes, NutritionFacts.org keeps a well-sourced library on beans and chickpeas, and Minimalist Baker has straightforward chickpea recipes once your batch is cooked. Both are reliable places to take the next step.
Storing Your Prepared Chickpeas
Cooked chickpeas keep in the fridge for 3 to 5 days. Store them in a little of their cooking liquid to keep them from drying out, or drained if you are about to roast them. They also freeze beautifully: cool them, spread them on a sheet pan to freeze loose, then bag them so you can grab a handful at a time. Frozen cooked chickpeas last about three months and drop straight into curries and soups. Drain them well before freezing so ice crystals do not turn them mealy. With a stash in the freezer, the slow prep you did once pays off across a dozen quick meals.
Frequently Asked Questions
Do I have to soak chickpeas before cooking?
For stovetop cooking, yes, soaking is strongly recommended because unsoaked chickpeas can take over two hours and cook unevenly. For a slow cooker or Instant Pot you can skip soaking, since those methods will cook dried chickpeas through with extra time. If you forgot to soak overnight, use the quick-soak method: boil two minutes, then rest one hour.
Should I add salt to the soaking or cooking water?
Yes. The old idea that salt toughens beans has been disproven. Salt in the cooking water helps chickpeas soften and seasons them from the inside. The thing to keep out of the pot is acid, such as lemon, vinegar, or tomatoes, because acid genuinely slows softening until the chickpeas are already tender.
What does baking soda do when preparing chickpeas?
A small pinch of baking soda in the cooking water raises the pH, speeds softening, and loosens the skins, which is why it is the trick for ultra-creamy hummus. Use only about a quarter teaspoon per cup of dried chickpeas, because too much leaves a soapy taste and turns them to mush. Skip it when you want chickpeas to hold their shape.
How do I prepare canned chickpeas for cooking?
Open the can, pour the chickpeas into a colander, and rinse them thoroughly under running water to wash off the packing liquid and excess sodium. Pat them dry with a towel if you are roasting or pan-frying, since dry chickpeas crisp better. For a smooth hummus, rub the rinsed chickpeas to remove the skins before blending.
Why are my chickpeas still hard after cooking a long time?
The most common reason is that the chickpeas are old and have lost too much moisture to rehydrate. Hard water and high altitude also slow softening, as does adding acidic ingredients too early. Use fresh chickpeas, cook in filtered water with a pinch of baking soda if your water is hard, and add any tomato or lemon only after the beans are tender.
How long do prepared chickpeas keep?
Cooked chickpeas last 3 to 5 days in the fridge, ideally stored in a little of their cooking liquid so they stay moist. For longer storage, freeze them loose on a sheet pan then bag them; they keep about three months and go straight from the freezer into soups, curries, and stews. Label the bag with the date, since a chickpea looks the same at one month as at six and it is easy to lose track in a busy freezer.