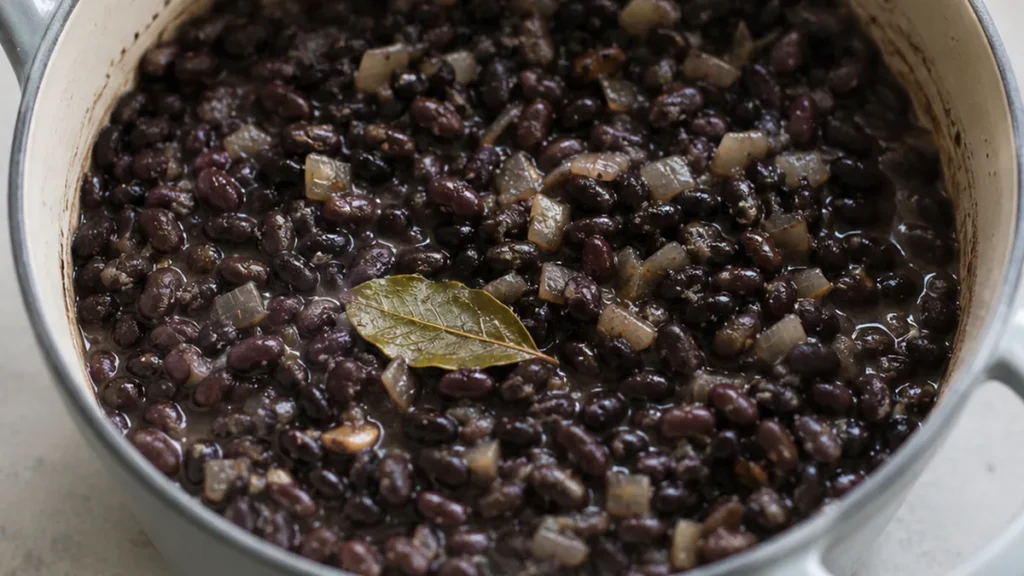
The secret to perfectly creamy black beans lies in a simple yet crucial step: proper hydration and a gentle simmer. This recipe offers a foundational dish that’s incredibly versatile and satisfying, far superior to anything from a can. Homemade black beans are not only budget-friendly but also a nutritious addition to countless meals, from bright rice bowls to hearty tacos. My early attempts at cooking black beans often resulted in a frustratingly firm or mushy texture. Consistency in soaking and simmering is the key to achieving that ideal balance, allowing the natural goodness of the black beans to truly shine through with just a few aromatic additions. Keep the heat at a bare simmer because a hard boil splits the skins and leads to uneven cooking.
Key takeaways
- Soak dried black beans overnight for even cooking and reduced time.
- Maintain a gentle simmer to prevent bursting skins and mushy texture.
- Add salt only in the last 30 minutes of cooking to ensure tender skins.
- Always keep the beans fully submerged in water; add hot water if needed.
Easy Homemade Black Beans: Flavorful & Simple!
Ingredients
- 16 ounces (2 cups) dried black beans
- 2 teaspoon olive oil
- 1 small onion, diced
- 1 clove garlic
- 1 bay leaf
- 4 cups water
- 1 teaspoon kosher salt, optional
Instructions
- The night before cooking (8-12 hours prior), cover the beans with water and soak them overnight to reduce cooking time.
- Heat the olive oil over medium heat in a medium-sized saucepan.
- Add the diced onions and cook for 4-5 minutes until translucent.
- Add the garlic and cook for another minute until fragrant.
- Add the bay leaf, black beans, water, and salt (if desired). Bring to a boil, then cover and simmer for 1 hour or until the beans are tender.
- Serve the black beans warm.
Notes
– For perfectly tender black beans, ensure they are fully submerged in water throughout the simmering process. Add more hot water if needed to keep them covered.
– Store cooked black beans in an airtight container in the refrigerator for up to 5 days, or freeze in portions for up to 4 months. To reheat, thaw in the fridge or gently warm on the stovetop, adding a splash of water if they seem dry.
– To check for doneness, taste a few black beans—they should be tender but not mushy. If they’re still firm after an hour, continue simmering, checking every 15 minutes. Nutrition information is an estimate, calculated automatically. Values vary with brands, substitutions and portion sizes.
The Technique: Achieving Creamy Perfection
The secret to perfectly cooked, flavorful homemade black beans lies in a two-fold approach: proper hydration and controlled simmering. Unlike most recipes that rush the process, the initial overnight soak is crucial as it rehydrates the legumes evenly, cutting down on active cooking time and ensuring a consistent, tender texture. During simmering, maintaining a gentle bubble—rather than a vigorous boil—is key. This slow, steady heat allows the beans to cook through without bursting their skins or turning to mush. Aromatics like onion, garlic, and a bay leaf infuse the black beans with depth during this process. Add salt only in the last 30 minutes of cooking, as this prevents the osmotic pressure from toughening the skins, a common pitfall. The overlooked detail here is that a hard boil creates too much agitation, causing the skins to break prematurely.
Troubleshooting Common Black Bean Issues
- Failure: Beans are hard and undercooked after the suggested time. Fix: Continue simmering. Dried beans vary significantly in age and density, which directly impacts cooking time. Ensure the legumes are fully covered by at least an inch of liquid. If the liquid has evaporated, add more hot water to maintain submersion.
- Failure: Beans are mushy and falling apart. Fix: Reduce heat immediately. A rapid, rolling boil can cause the skins to rupture and the interiors to break down too quickly. For future batches, aim for a bare simmer and consider slightly reducing the overall cooking time by 10-15 minutes.
- Failure: Bean skins are tough and separating from the interior. Fix: This often indicates salt was added too early. Ensure salt is only incorporated during the final 30 minutes of cooking. Adding it earlier can create an osmotic effect that prevents the skins from fully softening.
- Failure: The cooked beans have a slightly bitter or off-flavor. Fix: This can sometimes occur with older beans. Thoroughly rinse the dried legumes before soaking. For an existing batch, a tiny pinch (about 1/4 teaspoon) of baking soda added towards the very end of cooking can help neutralize bitterness, but use sparingly to avoid a soapy taste.
Strategic Substitutions and Their Impact
- Onion: Shallots or leeks can be used for a milder, slightly sweeter onion flavor. This will result in a more delicate aromatic base, complementing lighter dishes, though the robust base flavor will be less pronounced.
- Garlic: If fresh garlic is unavailable, 1/2 teaspoon of garlic powder can be substituted. Add it during the last hour of cooking to prevent it from burning or developing a harsh flavor. The fresh, pungent notes will be less pronounced compared to a fresh clove.
- Bay Leaf: A sprig of fresh thyme or a pinch of dried oregano can offer a similar herbaceous depth. While the flavor profile will differ, either herb will contribute a warm, savory note to the cooked legumes, but without the subtle, almost menthol-like quality of bay.
- Water: Low-sodium vegetable or chicken broth can be used instead of water for a richer, more complex flavor base. This adds an umami depth that plain water won’t provide, making the beans more savory for standalone consumption, though it can slightly overpower delicate spices.
Pro tips
– For optimal texture, soak dried black beans overnight (8-12 hours) to ensure even cooking and reduced time. – Maintain a gentle simmer throughout cooking to prevent bursting skins and a mushy texture. Avoid a vigorous boil. – Add salt only in the last 30 minutes of cooking. Adding it too early can toughen the bean skins. – Always keep the beans fully submerged in water; add hot water if needed to maintain coverage. – Store cooked black beans in an airtight container in the refrigerator for up to 5 days, or freeze in portions for up to 4 months.
Give this homemade black beans recipe a try and transform your meals with a truly satisfying staple. Enjoy them as a side, in tacos, or as the base for bright bowls!
Frequently asked questions
Can I make these black beans without soaking them overnight?
It is possible, but not recommended. Soaking dried black beans overnight significantly reduces cooking time and promotes more even cooking, preventing some from being hard and others mushy. If you skip soaking, expect the cooking time to at least double, potentially requiring 2-3 hours of simmering.
How can I prevent my black beans from becoming mushy?
To avoid mushy beans, maintain a bare, gentle simmer rather than a hard boil. A rolling boil agitates the beans too much, causing their skins to rupture and interiors to break down quickly. Also, ensure you add salt only in the last 30 minutes of cooking, as early salting can affect skin integrity.
What is the best way to store cooked black beans?
Cooked black beans can be stored in an airtight container in the refrigerator for up to 5 days. For longer storage, freeze them in individual portions for up to 4 months. When reheating from frozen, thaw them in the refrigerator overnight or gently warm on the stovetop, adding a splash of water if they appear too dry.
My black beans are still hard after an hour of simmering. What should I do?
Dried beans vary greatly in age and density, impacting cooking time. If your beans are still firm after an hour, continue simmering, checking for tenderness every 15 minutes. Ensure they are fully submerged in water; add hot water if the liquid level drops below the beans.