These cereal cookies are a marvel of simplicity and flavor, perfect for anyone craving a quick, satisfying treat without turning on the oven. This no-bake recipe combines a handful of pantry staples into a delicious, crunchy cookie that’s ideal for busy weekdays or impromptu gatherings. I remember the first time I tried a similar recipe, skeptical that something so easy could taste so good. But the chewy, crunchy texture and customizable flavors immediately won me over, making these cereal cookies a go-to in my kitchen. This recipe is designed for maximum ease and minimal fuss, making it accessible even for novice bakers. It’s a fantastic option when you need a quick dessert or a fun project with kids.
Key takeaways
- The binder mixture of nut butter and rice syrup must be heated to the correct temperature to achieve a sticky, pliable consistency.
- Ensure the binder is warm but not boiling when mixed with the cereal for even coating.
- Allow cookies to set completely at room temperature for optimal chewy-crisp texture.
- Work quickly once the cereal is mixed with the binder to shape the cookies before they harden.
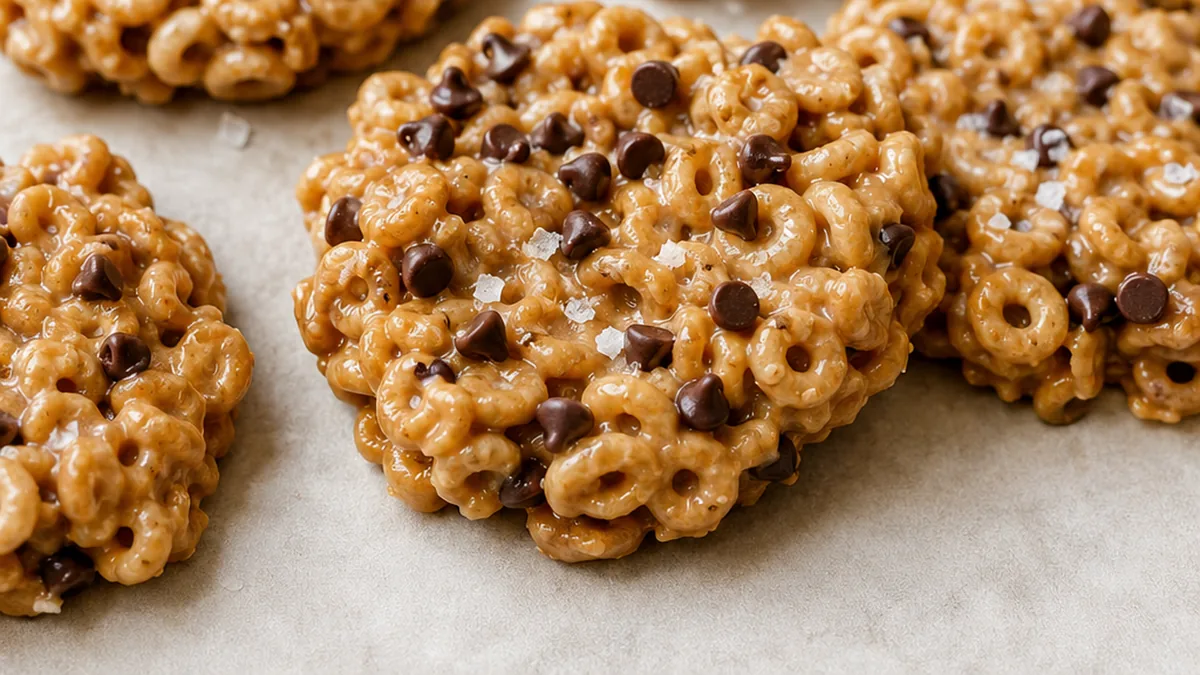
Crunchy No-Bake Cereal Cookies!
Ingredients
Method
- Place the nut butter and rice syrup in a small saucepan over low to medium heat and warm for 2 minutes or until it becomes smooth and combined.
- Place the cereal in a bowl, then pour the warm nut butter/rice syrup mixture into the bowl with the cereal and stir to combine thoroughly.
- Shape into cookies using a mini ice cream scooper or a tablespoon. Alternatively, press the mixture into a 9×9 inch ungreased pan.
- Allow the cookies or bars to cool completely. As the O’s mixture cools, it will harden, making them ready to enjoy.
Notes
– Press the mixture into a parchment-lined 8×8 inch pan for easy cutting into bars once cooled.
– If the mixture is too sticky to handle, lightly dampen your hands before shaping the cookies. This makes the process much smoother.
– Store the finished cereal cookies in an airtight container at room temperature for up to 5 days, or refrigerate for up to 2 weeks. Nutrition information is an estimate, calculated automatically. Values vary with brands, substitutions and portion sizes.
The technique that makes it
The success of these no-bake cereal cookies hinges on achieving the right consistency through the careful heating and cooling of the nut butter and rice syrup mixture. This creates a binder that coats the cereal evenly and allows the cookies to set. The key is to heat the nut butter and rice syrup just enough to become fluid and easily combined, but not so much that it boils vigorously or separates. Overheating can lead to a mixture that is too thin, resulting in cookies that don’t firm up properly. Conversely, insufficient heating will leave the mixture too stiff, making it difficult to coat the cereal and potentially leading to a crumbly texture. The goal is a sticky, pliable mixture that binds the cereal without becoming overly liquid. Once combined with the cereal, the mixture needs adequate time to cool and set at room temperature. This allows the rice syrup to re-solidify slightly, creating the characteristic chewy-crisp texture and holding the cereal clusters together. Chilling can speed this up, but room temperature setting often yields a better final texture, preventing the cookies from becoming too hard.
Troubleshooting
- Cookies are too crumbly and won’t hold their shape: The nut butter and syrup mixture was likely not heated enough, or it was too cool when combined with the cereal. Reheat the mixture gently until it’s fluid, then quickly re-coat the cereal and press into shape.
- Cookies are too soft or sticky after cooling: This indicates the mixture was overheated, causing the syrup to become too thin, or there wasn’t enough cereal for the amount of binder. Try adding a little more cereal to absorb excess moisture, or let the cookies air dry at room temperature for a few extra hours.
- Cereal is soggy: The mixture was likely too hot when combined with the cereal, or the cereal was added too soon after heating. Ensure the nut butter and syrup mixture has cooled slightly before adding the cereal, and work quickly to coat and shape.
- Mixture is too stiff to coat cereal: The nut butter and syrup mixture was not heated sufficiently. Return the mixture to low heat, stirring constantly, until it becomes smooth and pourable.
Substitutions
- Nut butter: Any smooth, unsweetened nut or seed butter can be used. Sunflower seed butter is a good option for nut allergies, resulting in a similar binding capability and a slightly different flavor profile.
- Rice syrup: Maple syrup or agave nectar can be used as a liquid sweetener. These will alter the final flavor and potentially the setting time and texture, with maple syrup offering a more pronounced flavor.
- O’s Cereal: Puffed rice cereal or other small, crunchy cereals like corn flakes (broken up) can be substituted. This will change the overall texture and flavor, with puffed rice being lighter and corn flakes offering a different kind of crispness.
- Vanilla extract: A small amount of almond extract or a pinch of cinnamon can be added for a flavor variation. This will impart a different aromatic quality to the cookies.
Pro tips
- For extra flavor, add a teaspoon of vanilla extract to the warm nut butter mixture.
- Press the mixture into a parchment-lined 8×8 inch pan for easy cutting into bars once cooled.
- If the mixture is too sticky to handle, lightly dampen your hands before shaping the cookies. This makes the process much smoother.
- Store the finished cereal cookies in an airtight container at room temperature for up to 5 days, or refrigerate for up to 2 weeks.
These cereal cookies prove that delicious treats don’t need to be complicated. Experiment with different types of O’s cereal or nut butters to find your favorite combination. Enjoy this simple pleasure!
Frequently asked questions
Why are my cereal cookies not firming up?
This usually happens if the nut butter and syrup mixture wasn’t heated enough to create a proper binder, or if the mixture was too cool when combined with the cereal. Ensure the mixture is warm and fluid, coating the cereal well, and allow ample setting time at room temperature.
Can I use a different type of cereal?
Yes, you can substitute other small, crunchy cereals like puffed rice or even broken corn flakes. Keep in mind that the texture and flavor of the cookie will change based on the cereal’s density and crispness.
How do I prevent the cookies from being too sticky?
If the cookies remain too sticky, the binder mixture might have been overheated, making it too thin. You can try adding a little more cereal to absorb excess moisture, or let the cookies air dry at room temperature for a longer period.
Can I add mix-ins like chocolate chips?
Absolutely. Mini chocolate chips can be stirred into the cereal mixture along with the binder, or pressed onto the tops of the cookies after shaping. They will set along with the cookies, adding pockets of chocolate flavor.
Try this next: Sweet & Chewy Cocodate Cookies
More from Vegan Desserts →