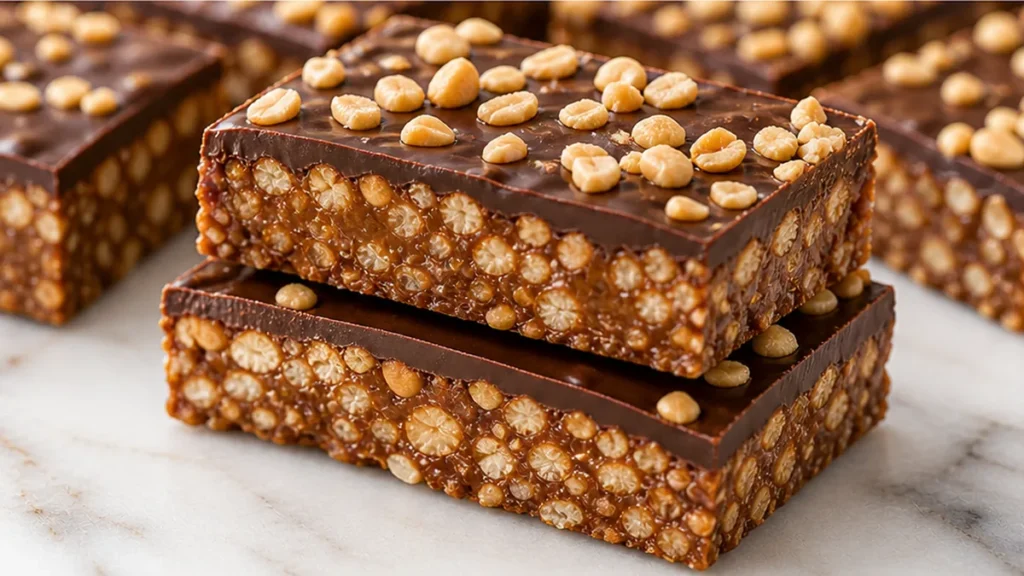
These peanut butter crunch bars are the ultimate no-bake treat for anyone craving a delightful combination of textures and flavors. With just five core ingredients, this recipe delivers an incredibly satisfying experience, blending creamy peanut butter, chewy dates, and crispy rice cereal, all enrobed in rich dark chocolate. Perfect for a quick dessert or a satisfying snack, these bars are surprisingly simple to prepare, making them an ideal choice for both beginner bakers and seasoned enthusiasts looking for a no-fuss, crowd-pleasing confection. The balance of sweet dates and savory peanut butter, amplified by the chocolate coating, creates a truly addictive peanut butter crunch.
Key takeaways
- The natural sweetness and binding power of Medjool dates are key to the no-bake crust.
- Gently fold in the Brown Rice Krispies to maintain their crispiness for optimal crunch.
- Properly melt or temper the chocolate for a smooth, glossy coating that sets well.
- Chill the bars thoroughly to ensure they hold their shape for clean slicing.

The ULTIMATE Chocolate Peanut Butter Crunch Bars!
Ingredients
Method
- Line an 8×8 inch square baking dish with parchment paper.
- In the bowl of a food processor, combine the peanut butter, dates, and vanilla. Pulse until well combined and the dough clumps together easily. Press the mixture into the prepared baking dish.
- Sprinkle the rice krispies over top, gently pressing them into the peanut mix to adhere. Transfer to the freezer and freeze until firm, 30 minutes to 1 hour.
- Melt the 12 ounces of dark chocolate in the microwave on 30 second intervals, stirring after each interval until melted and smooth. Let cool 10 minutes.
- Cut the frozen peanut butter base into 16 bars. Cover each bar in the melted dark chocolate and top with roasted peanuts. It’s easiest if the bars are very cold when doing this step.
- Let the chocolate set up, about 10 minutes. Keep stored in the fridge.
Notes
– Use Medjool dates as they are naturally soft and caramel-like.
– Make sure the bars are well-frozen before dipping in chocolate to prevent melting.
– If chocolate is too thick, add a teaspoon of coconut oil to thin it out. Allergens: Peanuts, Wheat, Soybeans. Nutrition information is an estimate, calculated automatically. Values vary with brands, substitutions and portion sizes.
The technique that makes it
The success of these Ultimate Chocolate Peanut Butter Crunch Bars hinges on a few key techniques that ensure both texture and flavor are perfectly balanced. The foundation is the no-bake crust, which relies on the natural stickiness of Medjool dates. Ensure your dates are fresh and soft; if they feel a bit dry, a brief soak in warm water (about 10 minutes) followed by thorough draining will rehydrate them, making them easier to blend into a cohesive paste. This date paste acts as the binder, replacing traditional butter and sugar found in baked goods. When processing the dates with peanut butter and vanilla, aim for a smooth, uniform mixture. This ensures even distribution of sweetness and binding power throughout the crust. Incorporating the Brown Rice Krispies is the next crucial step. Gently fold them into the date-peanut butter mixture rather than aggressively stirring. This preserves the crispiness of the cereal, which is essential for the ‘crunch’ element of the bars. Overmixing can crush the Krispies, leading to a less satisfying texture. Pressing this mixture evenly into your prepared pan is vital for uniform bars that slice cleanly. Use the bottom of a glass or a flat spatula to compact the layer firmly. Finally, the chocolate coating requires careful tempering or careful melting to achieve a smooth, glossy finish that sets well without blooming (developing white streaks). Melting chocolate slowly over a double boiler or in short intervals in the microwave, stirring frequently, prevents scorching and ensures a good texture. Chilling the bars thoroughly after coating allows the chocolate to set firmly, creating a clean break when you slice them.
Troubleshooting
- Failure: Crust is too sticky or crumbly. Fix: If too sticky, add a tablespoon more of Brown Rice Krispies at a time until manageable. If too crumbly, ensure dates were sufficiently processed into a paste, or add a teaspoon of melted coconut oil or a touch more peanut butter to help bind.
- Failure: Chocolate coating is dull or streaky. Fix: This indicates improper tempering or overheating. For a quick fix, try adding a teaspoon of neutral oil (like coconut or vegetable oil) to the melted chocolate and stir until smooth. For future batches, melt chocolate gently and avoid overheating.
- Failure: Bars are too soft and don’t hold their shape. Fix: Ensure the bars were chilled sufficiently until completely firm before slicing. If the date mixture was too wet, you might need to add slightly more Brown Rice Krispies next time.
- Failure: The ‘crunch’ is lost. Fix: This usually happens if the Brown Rice Krispies were crushed during mixing or if the bars sat out too long, allowing moisture to soften them. Fold the Krispies in gently and store the finished bars in an airtight container in the refrigerator.
Substitutions
- Nut Butter: While creamy peanut butter is classic, almond butter or cashew butter can be used for a different nutty profile. The texture might be slightly different, but the binding properties are similar.
- Dates: If Medjool dates are unavailable, other soft, pitted dates like Deglet Noor can work, but you may need to soak them longer to achieve the necessary paste consistency. Prunes could also be used, but will impart a different flavor.
- Cereal: For a gluten-free option, puffed quinoa or puffed rice cereal can replace the Brown Rice Krispies, though the crunch texture may vary slightly.
- Chocolate: Dark chocolate is recommended for balance, but milk chocolate or semi-sweet chocolate chips can be used. Adjust sweetness accordingly, as milk chocolate is sweeter. Ensure they melt smoothly.
Pro tips
- Ensure your peanut butter is smooth and creamy for the best texture.
- Use Medjool dates as they are naturally soft and caramel-like.
- Make sure the bars are well-frozen before dipping in chocolate to prevent melting.
- If chocolate is too thick, add a teaspoon of coconut oil to thin it out.
Enjoy these delightful peanut butter crunch bars as a quick, satisfying treat anytime. Experiment with different nut butters or toppings for endless variations!
Try this next: Chocolate Almond Butter Superfood Bars
More from Vegan Desserts →
Read also on TastyBend: Snickers Nutrition Facts: Calories, Sugar & Protein (2026).
Frequently asked questions
Can I make chocolate peanut butter crunch bars ahead of time?
Yes, these bars are perfect for making ahead. Once cooled and set, store them in an airtight container at room temperature for up to 3 days, or in the refrigerator for up to a week. They might become slightly firmer when chilled, so let them sit out for a few minutes before serving if desired.
What’s the best way to store chocolate peanut butter crunch bars?
For best results, store the cooled and set bars in a single layer in an airtight container. If stacking, place parchment paper between layers to prevent sticking. They will keep well at room temperature for a few days, or can be refrigerated for longer storage. Avoid direct sunlight or heat.
Can I substitute the type of peanut butter in this recipe?
You can use natural creamy or crunchy peanut butter. If using natural peanut butter, ensure it’s well-stirred as the oil can separate. Other nut butters like almond or cashew butter can also work, but may alter the flavor and texture profile slightly. Adjust sweetness if needed.
How do I know when the chocolate peanut butter crunch bars are done?
The bars are done when the chocolate topping is set and firm to the touch. You can test this by gently pressing the surface; it should not feel sticky or soft. The base layer should also be firm and hold its shape when sliced. If the chocolate is too soft, chill for longer.