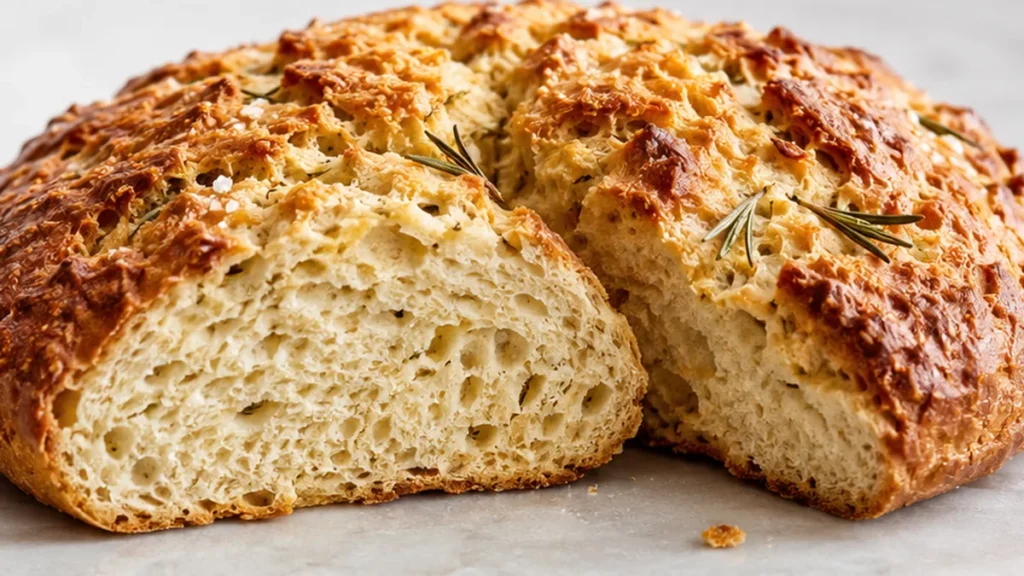
The secret to a truly exceptional no knead bread lies in patience and a high-temperature Dutch oven bake. This recipe simplifies the bread-making process, allowing anyone to achieve a bakery-quality loaf with minimal hands-on time, making it a fantastic entry point for aspiring bakers. Crafting a delicious no knead bread doesn’t require a stand mixer or extensive experience. The long fermentation time develops complex flavors, while the high heat of the Dutch oven creates that irresistible crispy crust and soft, airy interior that makes this no knead bread a staple in our kitchen.
Key takeaways
- The key to success is using fresh yeast and allowing adequate rise time.
- The beer’s carbonation and sugars are crucial for texture and flavor.
- Hydration level is high, which helps develop gluten without kneading.
- Substitutions can be made without significantly altering the final product.
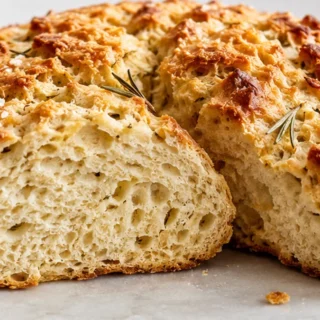
Easy No-Knead Beer Bread Recipe!
Ingredients
- 3 cups all-purpose flour
- 2 teaspoons instant yeast (rapid rise)
- 1-2 tablespoons chopped fresh rosemary (optional)
- 2 teaspoons kosher salt
- 1 (12 ounce) can or bottle room temperature beer (or 1 1/2 cups warm water)
- 2 tablespoons granulated sugar
Instructions
- In a large bowl, stir together the all-purpose flour, instant yeast, chopped fresh rosemary (if using), and kosher salt. Add the room temperature beer and mix with a spatula until just combined. The dough will be shaggy. Cover the bowl with plastic wrap and let it sit at room temperature for at least 12 hours, ideally overnight (12-18 hours).
- After the long rise, preheat your oven to 450°F (230°C). Place a large (5-6 quart) Dutch oven with its lid into the preheating oven and let it preheat for 30 minutes. This is crucial for a crispy crust.
- Generously dust a clean work surface with more all-purpose flour. Scrape the sticky, loose dough out of the bowl onto the floured surface. Using floured hands, gently form the dough into a loose ball. Carefully transfer the dough ball onto a piece of parchment paper. Cover it loosely and allow it to rise for another 1 hour, or until it has noticeably doubled in size.
- When ready to bake, carefully lift the dough (using the parchment paper as a sling) and gently place it into the preheated Dutch oven. Cover the Dutch oven with its lid.
- Bake the bread, covered, for 30 minutes. After 30 minutes, carefully remove the lid and continue baking for another 15-20 minutes, or until the bread has a deep, golden-brown crust.
- Carefully remove the Dutch oven from the oven. Using the parchment paper, lift the bread out and transfer it to a wire rack to cool completely before slicing. Enjoy warm with softened butter and a sprinkle of sea salt.
Video
Notes
– If you don’t have beer, warm water works perfectly fine. The beer adds a subtle depth of flavor but is not essential for the structure.
– To check for doneness, the internal temperature of the bread should reach 200-210°F (93-99°C). Nutrition information is an estimate, calculated automatically. Values vary with brands, substitutions and portion sizes.
The technique that makes it
This Easy No-Knead Beer Bread recipe relies on the science of fermentation and hydration to create a flavorful and airy loaf without the need for traditional kneading. The instant yeast activates quickly, aided by the sugars present in the beer, which helps in the fermentation process. The carbonation in the beer also contributes to the light texture by creating bubbles as the dough rises. The high hydration level—thanks to the beer—allows for gluten development without the need for kneading, resulting in a soft crumb and a crisp crust. The optional addition of fresh rosemary enhances the flavor profile, providing a fragrant herbal note that complements the maltiness of the beer.
Troubleshooting
- Issue: Bread is too dense.
- Fix: Ensure the yeast is fresh and properly activated. Consider increasing the fermentation time to allow for better gluten development.
- Issue: Bread has a flat top.
- Fix: This can occur if the dough is not given enough time to rise. Allow the dough to rest until it doubles in size before baking.
- Issue: Crust is too hard.
- Fix: Reduce the baking time or cover the bread with foil during the last 10-15 minutes of baking to prevent over-browning.
- Issue: Bread has a bitter taste.
- Fix: Use a lighter beer, as darker beers can impart a more intense flavor. Ensure that sugar is properly measured to balance the bitterness.
Substitutions
- All-purpose flour: Substitute with bread flour for a chewier texture, but expect a slightly denser loaf.
- Beer: Use warm water instead for a non-alcoholic version; the flavor will be milder but still effective in creating a good rise.
- Fresh rosemary: Swap with dried herbs like thyme or oregano for a different flavor profile without compromising texture.
- Kosher salt: Use sea salt instead; just adjust the amount slightly as sea salt can be more potent.
Pro tips
- For the crispiest crust, ensure your Dutch oven is thoroughly preheated for the full 30 minutes before adding the dough. I once rushed this step, and the crust wasn’t as satisfyingly crisp.
- If you don’t have beer, warm water works perfectly fine. The beer adds a subtle depth of flavor but is not essential for the structure.
- To check for doneness, the internal temperature of the bread should reach 200-210°F (93-99°C).
This no-knead bread recipe proves that artisanal bread is within everyone’s reach. Experiment with different herbs like thyme or omit them for a classic loaf. Enjoy the simple pleasure of homemade bread!
Frequently asked questions
Can I use any type of beer for this recipe?
Yes, you can use any type of beer, but lighter beers will yield a milder flavor, while darker beers will impart a richer taste. Choose according to your preference.
How long should I let the dough rise?
Let the dough rise until it doubles in size, which typically takes about 1 to 2 hours. Warmer environments may speed up the process, while cooler ones may take longer.
Can I add other ingredients to the dough?
Absolutely! You can add ingredients like cheese, olives, or sun-dried tomatoes for additional flavor. Just be mindful of the moisture content to avoid affecting the dough’s hydration.
How should I store leftover bread?
Store leftover beer bread in an airtight container at room temperature for up to 3 days. For longer storage, wrap it tightly in plastic wrap and freeze for up to 3 months.
More from Vegan Air Fryer →