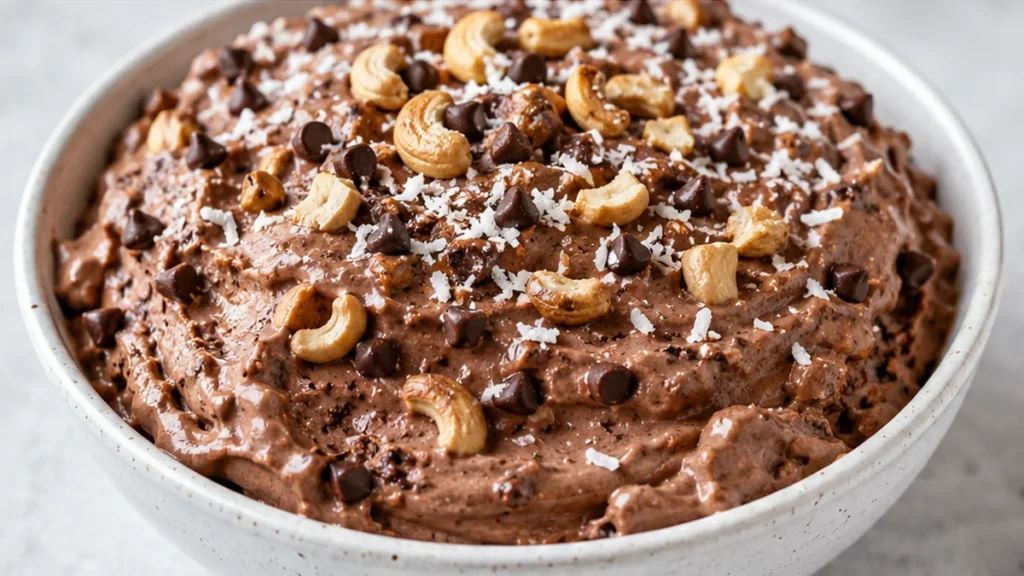
The secret to an irresistible chocolate blizzard lies in a combination of rich flavors and surprising textures, especially when you introduce a homemade edible cookie dough. This recipe delivers exactly that, offering a delightful no-churn chocolate coconut ice cream that’s surprisingly easy to achieve at home. The chocolate blizzard becomes a truly special treat when you bypass the traditional ice cream machine steps, relying instead on the richness of full-fat coconut milk for a creamy base. This particular chocolate blizzard recipe stands out due to its dual texture appeal: the smoothness of the coconut ice cream beautifully contrasts with the chewy, chocolatey cookie dough chunks. It’s a perfect dessert for those who love a bit of texture in their frozen treats and appreciate a robust chocolate and coconut flavor profile.
Key takeaways
- Emulsification of chilled coconut milk is key for texture.
- Incorporate enough air when whipping for creaminess.
- Toss chocolate chips in flour to prevent sinking.
- Adjust sweetness and cocoa to personal taste.
Heavenly No-Churn Chocolate Coconut Blizzard!
Ingredients
- 2 tablespoons roasted cashews
- 1/2 cup butter (vegan butter or coconut oil)
- 3/4 cup brown sugar
- 2 teaspoons vanilla extract
- 1 cup flour
- pinch salt
- 3/4 cup mini chocolate chips
- 1/2 cup pure cane sugar or granulated sugar
- 2 cans full fat coconut milk (chilled)
- 3/4 cup cocoa powder
Instructions
- Make sure to put your ice cream bowl in the freezer the night before.
- Make the Cookie Dough: Add the cashews to a food processor or high power blender, process for 2 minutes or until the cashews are a fine powder. Add the butter (or coconut oil), brown sugar and vanilla and process another 30 seconds to 1 minute or until smooth and creamy. Add the flour and salt, process until combined. If the mixture seems dry add a tablespoon of milk or water. Stir in the chocolate chips.
- Line a baking sheet with parchment and spread the cookie dough out in an even layer about 1/4 inch thick. Place in the freezer until ready to use. Chop into small chunks.
- To make the Ice Cream: Add the sugar to a food processor or high powered blender. Process 1-2 minutes and then add the coconut milk, cocoa powder, vanilla bean seeds, vanilla extract and salt. Process one minute or until smooth and combined.
- Pour the mixture into a 2 to 4 quart ice cream freezer bowl and process for 20 to 25 minutes.
- During the last five minutes of the churning process add the cookie dough chunks. Churn for 3 to 5 minutes longer. Serve immediately and freeze any remaining ice cream.
Video
Notes
The technique that makes it
The key to achieving the perfect texture in your Heavenly No-Churn Chocolate Coconut Blizzard lies in the proper emulsification of the coconut milk and the incorporation of air. Chilling the coconut milk allows the fat to solidify slightly, creating a creamy base that whips well. When combined with the cocoa powder and other ingredients, the mixture should be whipped until it becomes light and airy. This is crucial for achieving that blizzard-like consistency without the need for an ice cream maker. Additionally, the balance of fat from the coconut milk and the sweetness from the sugars helps to create a rich, indulgent flavor profile, while the mini chocolate chips add delightful bursts of chocolate throughout.
Troubleshooting
- Problem: The mixture is too liquidy.
Fix: Ensure that the coconut milk is well-chilled before use. If it’s still too runny, consider adding a bit more cocoa powder to thicken it up. - Problem: The final product is icy rather than creamy.
Fix: This can happen if the mixture isn’t whipped enough. Whip the coconut milk mixture until it’s light and fluffy, ensuring enough air is incorporated. - Problem: The chocolate chips sink to the bottom.
Fix: Toss the chocolate chips in a small amount of flour before adding them to the mixture. This will help suspend them throughout the ice cream base. - Problem: The flavor is too strong or too sweet.
Fix: Adjust the amount of cocoa powder or sugar according to your taste preferences. You can reduce the sugar slightly if you prefer a less sweet dessert.
Substitutions
- Vegan butter: Substitute with coconut oil for a dairy-free alternative, which will enhance the coconut flavor.
- Brown sugar: Use coconut sugar to maintain a similar flavor profile while making it more natural.
- Mini chocolate chips: Swap for dark chocolate chunks for a richer chocolate experience.
- Flour: Use almond flour for a gluten-free version, which will yield a slightly different texture but still delicious results.
Pro tips
- For the creamiest chocolate blizzard, ensure your full-fat coconut milk cans are thoroughly chilled in the refrigerator overnight. This helps the cream separate and solidify.
- When processing the cashews for the cookie dough, aim for a very fine powder. This ensures a smooth dough texture that won’t feel gritty in the ice cream. I once rushed this step, and the cookie dough had an unpleasant crunch.
- If your cookie dough mixture feels too dry after adding the flour, add milk or water one tablespoon at a time. The goal is a pliable, not crumbly, dough that holds its shape when chilled.
- For storage, any leftover chocolate blizzard can be frozen in an airtight container for up to 2 weeks. Allow it to soften slightly at room temperature before serving for the best texture.
This Chocolate Coconut Ice Cream Cookie Dough Blizzard offers a delightful escape into a world of rich flavors and satisfying textures. Experiment with different mix-ins or chocolate types to customize your perfect frozen treat. Enjoy every spoonful!
Frequently asked questions
Can I use low-fat coconut milk?
Using low-fat coconut milk may result in a less creamy texture, as it contains less fat. For the best results, stick to full-fat coconut milk to achieve that rich, indulgent flavor and texture.
How long does it take to freeze?
After mixing all the ingredients, allow the blizzard to freeze for about 4-6 hours. For best results, let it freeze overnight to achieve the perfect consistency.
Can I add other mix-ins?
Absolutely! Feel free to add nuts, shredded coconut, or even fruit to customize your blizzard. Just be cautious not to add too many wet ingredients, as this can affect the texture.
What if I don’t have cocoa powder?
If cocoa powder is unavailable, you can use a chocolate syrup or melted chocolate instead. However, you’ll need to adjust the sugar content since these alternatives are often sweetened.
More from Vegan Desserts →